Difference between revisions of "How to GM"
(→Crafting Recipes) |
|||
| (5 intermediate revisions by 2 users not shown) | |||
| Line 1: | Line 1: | ||
| + | {{engine}} | ||
| + | |||
==Introduction== | ==Introduction== | ||
| + | |||
| + | |||
| + | |||
| + | Acting as a Game Master requires you to either be flagged as a GM by the server's super-user or that you yourself be the super-user. To learn more about running your own server, have a look at the [[Running_your_own_server|Running your own server]] section. | ||
| Line 85: | Line 91: | ||
| + | Lugdunon also provides an in-game editor for NPCs, or non-player characters. While in editing mode, you can access the NPC editor by clicking on the NPC editor button in the lower right corner of the screen. | ||
| + | [[File:Npc-enBtn.png|frame|none|alt=The NPC Editor Button|The NPC Editor Button]] | ||
| − | |||
| + | Currently the NPC editor allows for the physical appearance of the NPC to be edited as well as the name, and is very similar to the player character creation panel. In the future, the ability to add equipment, weapons, loot drops, and configure the AI (behavior) will be made available here. Selecting an NPC is accomplished by using the two paging buttons to the left and right of the NPC template id. To add a new NPC, click the ‘+’ button located below the NPC template id. | ||
| + | [[File:Npc-npce.png|frame|none|alt=The NPC Editor|The NPC Editor]] | ||
| − | + | The NPC template creation dialog appears after you have clicked the ‘+’ button on the main NPC editor. Simply select from the predefined sprites and supply an NPC template id and click OK to create a new NPC template. | |
| + | [[File:Npc-tmpsel.png|frame|none|alt=The NPC Template Creator Dialog|The NPC Template Creator Dialog]] | ||
| + | In both the template selector and editor, mousing over the sprite preview will reveal a few options. The middle button will toggle zooming, and the left and right buttons will cycle through all the sprite’s animations, allow the preview of changes from all angles. | ||
| − | |||
| − | + | [[File:Npc-npcP.png|frame|none|alt=Sprite Preview|Sprite Preview]] | |
| − | + | ||
| − | + | ||
| − | + | ||
| − | [[File:|frame|none|alt=|]] | + | |
==Spawn Configuration== | ==Spawn Configuration== | ||
| + | NPCs can be set to spawn automatically in a desired location by using the ‘NPC Spawner’ tool to place a spawn point in the game world. It is important to note that NPC spawners are only visible in edit mode. | ||
| − | + | [[File:Spawn-spawnTool.png|frame|none|alt=The Spawn Tool|The Spawn Tool]] | |
| − | [[File:|frame|none|alt=|]] | + | |
| + | Once it has been placed, an NPC spawn point will show the effective spawn radius in red. To edit a particular spawner’s properties, simply click the spawner with the configuration tool. | ||
| + | [[File:Spawn-spawn.png|frame|none|alt=An NPC Spawner|An NPC Spawner]] | ||
| − | |||
| + | The spawn editor consists of a list of NPC types on the left and additional configurable properties on the right. To add an NPC type, click the ‘Add NPC’ button at the bottom of the NPC list. To delete a particular NPC, click the delete button located in the upper right of its list item. NPCs spawn based on a percentage. To alter the probability that a particular NPC will spawn, edit the field in the NPC’s list item. The spawn percentages will then update for all NPC types. | ||
| + | You can also configure the total number of NPCs allowed at any one time (limited to 100 maximum), the spawn radius (limited to 20 tiles maximum), the respawn timer (30 seconds minimum), and whether an NPC should spawn immediately (at the start of the timer) or not (at the completion of the timer). | ||
| − | [[File:|frame|none|alt=|]] | + | [[File:Spawn-confsc.png|frame|none|alt=The Spawn Configuration Dialog|The Spawn Configuration Dialog]] |
| + | When you click the ‘Add NPC’ button, you will be presented with a dialog of all defined NPC types, excepting the ones already associated with the current spawner. Use the paging buttons to select the desired NPC and click OK to add it to the list. | ||
| + | [[File:Spawn-npcsel.png|frame|none|alt=The NPC Selector Dialog|The NPC Selector Dialog]] | ||
| − | [[ | + | [[Category:Server Hosting|How to GM]] |
Latest revision as of 16:48, 15 February 2015
|
Contents |
Introduction
Acting as a Game Master requires you to either be flagged as a GM by the server's super-user or that you yourself be the super-user. To learn more about running your own server, have a look at the Running your own server section.
As a Game Master you have direct control, from the game client, of a growing number of elements in the game world. The aim is to make creating that world as easy and as enjoyable as possible, and hopefully this document will give you the knowledge needed to go forth and create engaging worlds to immerse your players in.
The server’s super-user (defined in server.cfg) as well as other GMs can grant or revoke GM status from other players using the /gm command. For obvious reasons the server’s super-user cannot have their GM status revoked.
Currently GMs can edit the following aspects of the game from within the game client itself:
- Terrain layers, via the terrain painting tools.
- Terrain elevation, via the terrain elevation tool.
- Placeable items.
- Placeable item configuration, via the configuration tool.
- Spawn points.
- Total NPCs allowed at once.
- Spawn radius.
- Individual NPC respawn rate.
- Immediate spawn flag.
- NPC types allowed at spawn, as well as their probability of spawning in relation to other NPC types allowed at this spawn point.
- Spawn points.
- Signs.
- Edit sign content (same as using a charcoal artist’s set in play mode).
- NPC templates, create and edit existing.
- Crafting recipes, create and edit existing.
In the future, GMs will have access to additional in-game editors. Currently all of these features but the last two are available and editable if you have access to the server-side file system and a basic understanding of the JSON data format. A few of the editors planned currently are:
- Advancements.
- Items.
- Placeable items.
- NPC behaviors (AI).
- NPC equipment and weapons / attacks.
- NPC drops.
- Quests.
Terrain and Placeable Items
Terrain, elevation and placeable items are what give the world structure and define the physical spaces in which your players will go about their in-game lives. The following video provides a brief overview of the GM UI, as well as how to edit terrain and placeable objects. Future videos will examine the other aspects of in-game editing.
Placeable Item Configuration
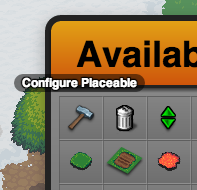
Certain placeable items, such as signs and NPC spawn points can be ‘configured’ using a special tool. This tool resembles a hammer and its tooltip reads ‘Configure Placeable’.
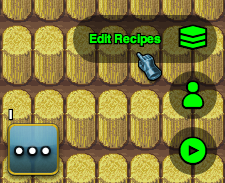
If an item has properties that are configurable, the hammer icon will show when moused over with the configure tool selected. To pull up whatever configure UI is available for that particular placeable, simply click the placeable instance with the configure tool selected.
Crafting Recipes
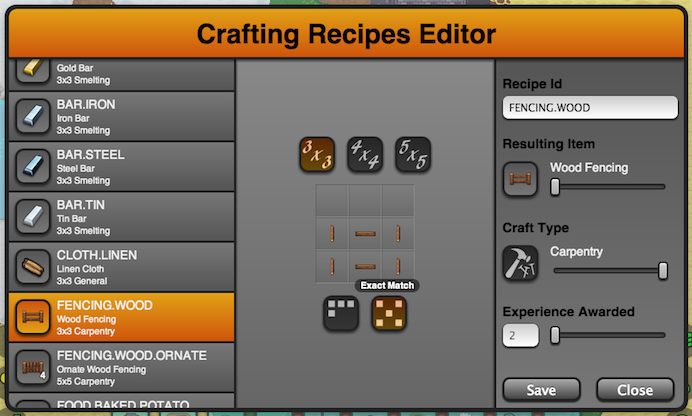
Lugdunon provides an in-game editor for crafting recipes. With it you can set the pattern, type, discipline, resulting item, and experience gained. While in editing mode, you can access the crafting recipe editor by clicking on the crafting recipe editor button in the lower right corner of the screen.
The crafting recipe editor consists of a list of all currently available recipes on the left, a crafting square in the center, and crafting recipe details on the far right.
The three buttons above the crafting square set the recipe’s size as 3×3, 4×4, or 5×5. The two buttons below the crafting square toggle between the two recipe pattern matching modes. The first one is called ‘freeform match’ and will match if all of the items (and only those items) are present in the crafting container, regardless of placement. The second one is called ‘exact match’ and requires the the items to be laid out in the exact order and count as is represented in the crafting square.
On the right pane are the configurable details for the recipe, including the recipe id, resulting item and stack size slider, crafting discipline, and the amount of experience awarded.
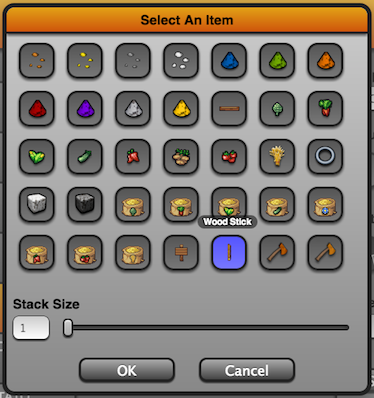
When you click on a item or empty slot in the crafting square, or click on the resulting item button, you are presented with an item selector dialog. Scroll through to find the desired item and the stack size may also be set at this time. If the item is not capable of being stacked, the stack size slider will be disabled.
Non-Player Characters
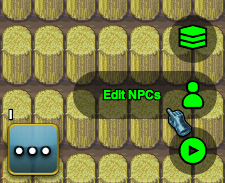
Lugdunon also provides an in-game editor for NPCs, or non-player characters. While in editing mode, you can access the NPC editor by clicking on the NPC editor button in the lower right corner of the screen.
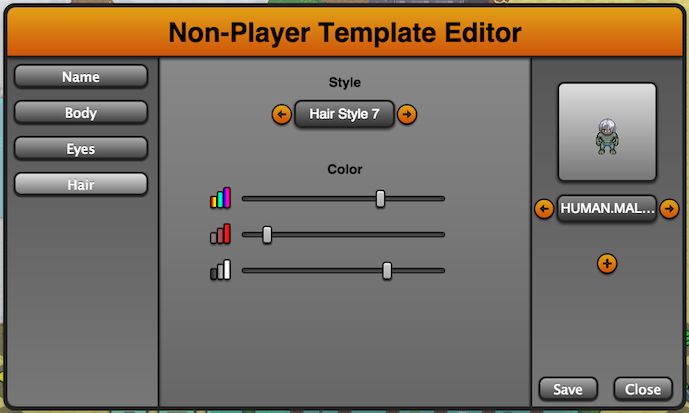
Currently the NPC editor allows for the physical appearance of the NPC to be edited as well as the name, and is very similar to the player character creation panel. In the future, the ability to add equipment, weapons, loot drops, and configure the AI (behavior) will be made available here. Selecting an NPC is accomplished by using the two paging buttons to the left and right of the NPC template id. To add a new NPC, click the ‘+’ button located below the NPC template id.
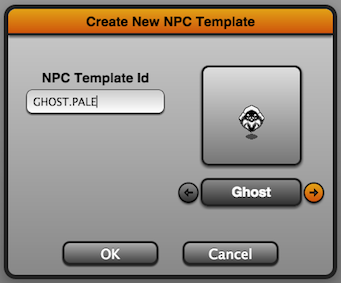
The NPC template creation dialog appears after you have clicked the ‘+’ button on the main NPC editor. Simply select from the predefined sprites and supply an NPC template id and click OK to create a new NPC template.
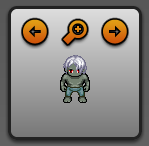
In both the template selector and editor, mousing over the sprite preview will reveal a few options. The middle button will toggle zooming, and the left and right buttons will cycle through all the sprite’s animations, allow the preview of changes from all angles.
Spawn Configuration
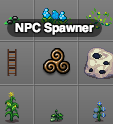
NPCs can be set to spawn automatically in a desired location by using the ‘NPC Spawner’ tool to place a spawn point in the game world. It is important to note that NPC spawners are only visible in edit mode.
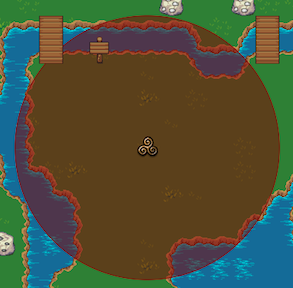
Once it has been placed, an NPC spawn point will show the effective spawn radius in red. To edit a particular spawner’s properties, simply click the spawner with the configuration tool.
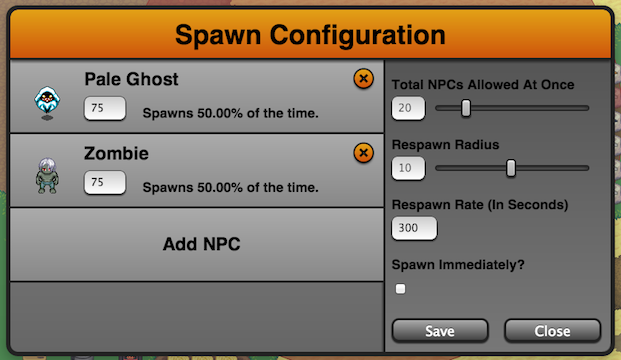
The spawn editor consists of a list of NPC types on the left and additional configurable properties on the right. To add an NPC type, click the ‘Add NPC’ button at the bottom of the NPC list. To delete a particular NPC, click the delete button located in the upper right of its list item. NPCs spawn based on a percentage. To alter the probability that a particular NPC will spawn, edit the field in the NPC’s list item. The spawn percentages will then update for all NPC types.
You can also configure the total number of NPCs allowed at any one time (limited to 100 maximum), the spawn radius (limited to 20 tiles maximum), the respawn timer (30 seconds minimum), and whether an NPC should spawn immediately (at the start of the timer) or not (at the completion of the timer).
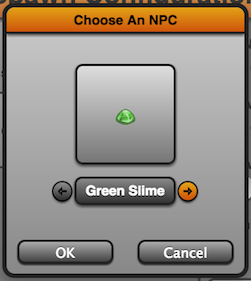
When you click the ‘Add NPC’ button, you will be presented with a dialog of all defined NPC types, excepting the ones already associated with the current spawner. Use the paging buttons to select the desired NPC and click OK to add it to the list.
