How to Play
Contents |
Movement
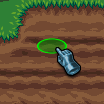
Movement is accomplished by simply clicking where you want to go, so long as the destination is marked by a green targeting oval. If there is a clear, unobstructed path to the requested location your character will move there. You may click on another destination while your character is currently in the process of moving to another destination. If there is no path, or the path is too long your character will simply stay put. If you are trying to move behind a targetable object, you may temporarily disable the mouseover selection of objects by holding down the ‘control’ key.
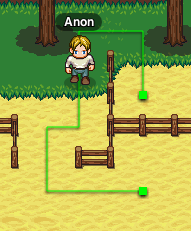
Currently in the alpha build you can enable character path rendering by typing /df paths into the console. This will show the path that characters are taking as a green line.
Movement may also be accomplished by using the keyboard. The default keybindings for movement are the standard WASD and arrow key setups.
Inventory
You can access your inventory by hitting the ‘i’ key on your keyboard or clicking on the ‘…’ button on the far right of your action bar. You can close it at any time by hitting the ‘i’ key on your keyboard or clicking anywhere on the game field outside the inventory window.
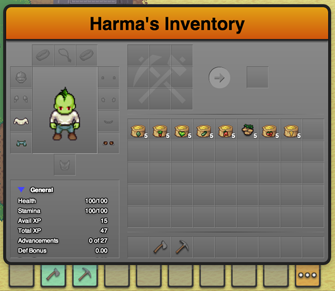
The inventory window consists of five main areas: your character’s ‘equipment’ or the items they are wearing, your character’s stats, the crafting area (which will be discussed later), the main inventory space, and finally the action bar.
You are free to drag items around the inventory screen as you wish, with the exception of your character’s equipment slots. Only items that can be worn in that particular slot can be dragged onto an equipment slot. If you move an item from one your character’s equipment slots into the general inventory, you are effectively removing the item from your character’s body and all the properties that particular item bestows when worn will be removed as well.
With stackable items, there are a few extra things to consider. You can drag an item or stack of items onto another partial stack of the same item and it will add them together. Holding ‘shift’ while dragging a stack to an empty slot will split the stack in half, and holding ‘alt’ (‘option’ on macintosh computers) down while dragging a stack to an empty slot will leave one item behind and carry the rest to the target slot.
If you wish to use an item in the game world, simply drag the item to a slot on the action bar. Then after dismissing the inventory window, you will be free to use or select the item on the action bar to use as your main item.
To delete an item, simply drag it off the inventory window to the game field and you will be greeted with a prompt to guard against accidental deletions.
Interacting with the game world
Interacting with elements in the game world consists of using a particular item on a particular element. To use an item, make sure it is on your action hotbar and selected. You may select an item on the hotbar using one of three methods: clicking on it, using your mouse’s scroll wheel to cycle through them, or by using one of the predefined hotkeys (1-9 activates the main action buttons in left-right order and 0 activates the ‘…’ button).
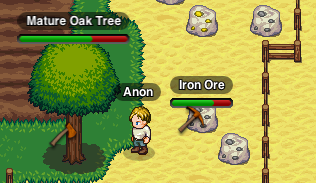
Each item has one or more specific uses. For instance, you would use an axe on a tree to chop it down, or a pickaxe on an ore vein to mine it. Holding the ‘shift’ key down while interacting with elements will lock your character in place, preventing them from accidentally moving.
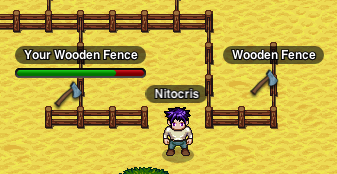
There is a concept of ‘ownership’ in lugdunon. If a game master places items, players will not be able to interact with that item if it is not permanent. If a player places an item you will only be able to interact with that item if you were the one who originally placed it. An item you can interact with will have a durability bar below its label.
Shovels have the unique ability of being able to ‘claim’ a tree or flower that a game master has placed. Use the shovel to uproot the tree or flower and you will receive an item in your inventory that allows you to replant the tree or flower where you choose. Once the item has been replanted, it will be ‘owned’ by you.
When you perform an action on an element that results in loot being generated, your share will automatically appear in your inventory. You will be notified of this via the console. Be aware though that in the current build, if you do perform an action that results in loot being generated with a full inventory, that loot will be lost!
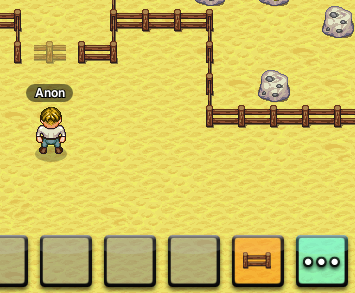
You may also place certain items in the game world, such as fencing. Simply drag the item to the action bar in your inventory, and then select it as the current tool. You are now free to place the item! Be aware though, that placing things may consume the item. Usually you can retrieve the item by using the appropriate tool on your placed item (in the case of a wooden fence, an axe should do the trick).
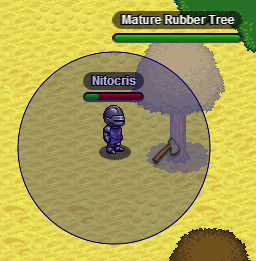
Keep in mind that most items have a range limit to them, so they will only work if used if the cursor is close enough to the player’s character. To see what the range of your currently selected tool or placeable item is, hold down the ‘alt’ key (or ‘option’ key on a Macintosh) to see the range. Tools and placeable items will display their range in blue, whereas weapons with display their range in red.
Character Advancement
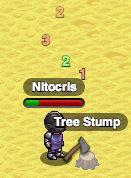
In Lugdunon pretty much everything you do: crafting, resource gathering, combat, etc, can grant your character experience. Experience can be used primarily as currency to purchase perks and upgrades through the advancement system. When you gain experience, the amount gained will appear to float upwards from you character’s name plate in green.
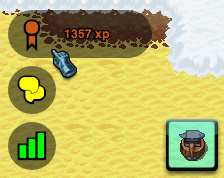
Once you have gained enough experience, you can spend it by clicking on the advancements button located in the lower left of the game screen. When you mouse over this button, it will slide out to reveal how much experience you currently have available for spending.
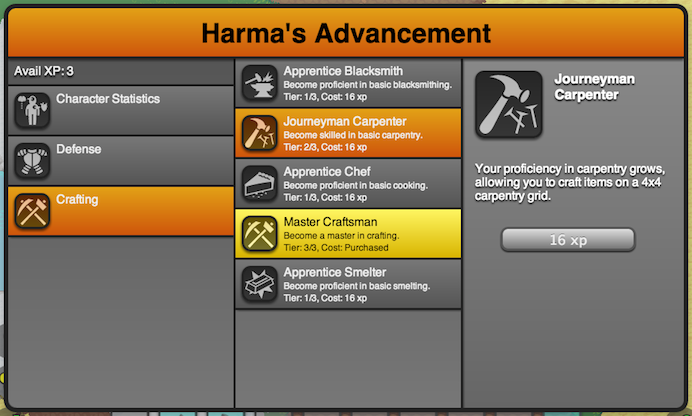
Clicking on that button will open the Advancement UI. In the default game implementation, the cost of a particular advancement is 2ca, where ca is the current number of advancements purchased, capping at 220 (or 1,048,576). This results in an exponential growth in advancement cost. Keeping that in mind, you must plan your initial purchases carefully, as the cost will rapidly become quite expensive. The amount of experience that you currently have available to spend is visible in the upper left of the UI.
Advancements are currently grouped into three categories: items that affect your character’s stats, items that affect your character’s capability for defense, and crafting. Clicking on one of the three groups will load the appropriate advancements in the list to the right. Further, clicking on an advancement item will show more detail to the right, along with a purchase button showing the cost to purchase the advancement. If an advancement has already been purchased, it will appear with a golden highlight, and the cost reading ‘Purchased’.
Advancements can be tiered, in the sense that once you purchase an advancement, another becomes available that builds on the previous one. If an advancement is tiered, the currently available tier (or max tier if the final tier has been purchased) will be displayed in the advancement list item.
Crafting is tied in fairly tight with advancements, requiring the purchase of advancements before the ability to craft is even available. Typically you would spend your first few experience points on becoming proficient in each of the crafting methods before focusing on other upgrades.
Crafting
As stated in the Character Advancement section, the ability to craft in Lugdunon is unlocked via advancements. Each crafting discipline is gated in 3 tiers: Apprentice, Journeyman, and finally Master. With each successive tier, the size of the crafting grid increases, and attaining the final tier also awards you with special perks tailored to that discipline.
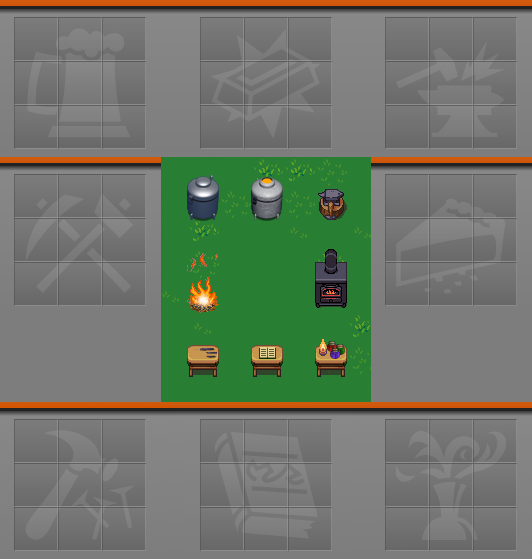
Currently there are eight crafting disciplines available: general, smelting, blacksmithing, carpentry, arcane research, alchemy, brewing, and cooking.
General crafting appears when you open your inventory UI by hitting the ‘i’ or using the ‘…’ hot bar button. Basic stone tools and weapons can be crafted using this discipline, along with simple clothing and several other recipes. Each of the other disciplines requires the use of a specialized crafting station. These crafting stations are placed within the game world and their associated crafting discipline UI can be opened by clicking on them while standing in close proximity.
Smelting is used primarily to smelt ores into metal bars, and to combine bars and other items to create alloys. Smelting requires the use of a smelting furnace.
Carpentry is used in the crafting of wooden products, such as furniture, crates, barrels, and fencing. Carpentry requires the use of a carpentry bench.
Blacksmithing is used to craft items made of metals. Metal armor, keys, and advanced tools and weapons are created with blacksmithing. Blacksmithing requires the use of an anvil.
Arcane Research is used to research various spells, resulting in scrolls that can be used to learn a given spell. Arcane Research requires the use of a researcher's bench.
Alchemy is used to craft reagents used in the casting of various spells. Alchemy requires the use of an alchemist's bench.
Brewing is used to manufacture various beverages for consumption. Brewed beverages will be able to grant various modifiers. Brewing requires the use of a fermentation vessel.
Cooking is used in the preparation of foods, as well as other crafting recipes that require a generally lower amount of heat than smelting. Cooking requires the use of a oven, or campfire.
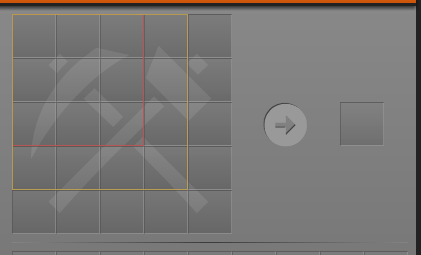
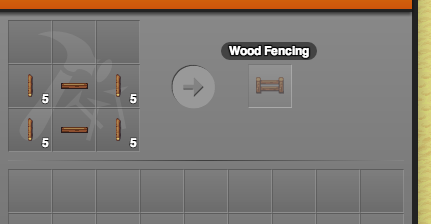
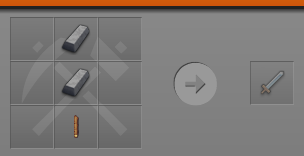
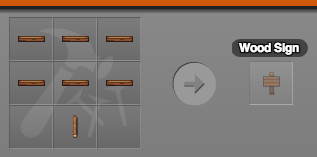
Crafting items is fairly straightforward. At the top right of your character’s inventory screen is a crafting area. The crafting area consists of a work area on the left and an output on the right. Crafting works by arranging specific items in a pattern to satisfy the requirements of a given recipe. When the pattern matches a recipe, the output will be populated with a transparent icon representing the item that will be crafted from the recipe. To actually make the item, simply drag the transparent item in the output to your inventory and the item will be created. You may also click the item to create it, provided you have the space in your inventory to accomodate the new item(s).
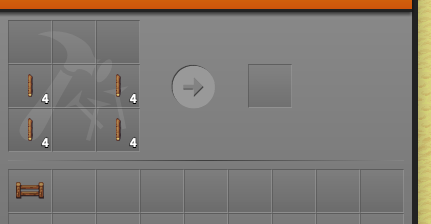
Once you create the item, items in the work area that are consumed in the process of crafting the item will be removed from the work area. For instance if you were to drag the Wood Fencing from the previous crafting scenario into the general inventory, your work area would now resemble the figure below. A full list of crafting recipes is available on the main Lugdunon website here.
Farming
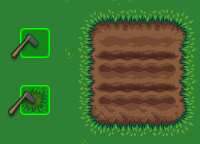
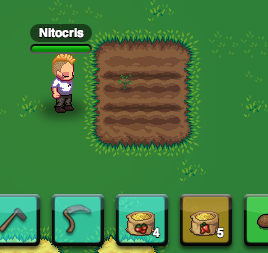
Farming allows you to grow and maintain your own resources. New characters start out with 5 of each available seed (or in the case of potatoes, the potatoes themselves) to start their farm. In order to plant and raise crops you need tilled soil. In order to till soil, you’ll first need to craft a Hoe. You may only till areas surrounded by bare grass or previously tilled soil. You can also return tilled soil back to grass by simply tilling it again.
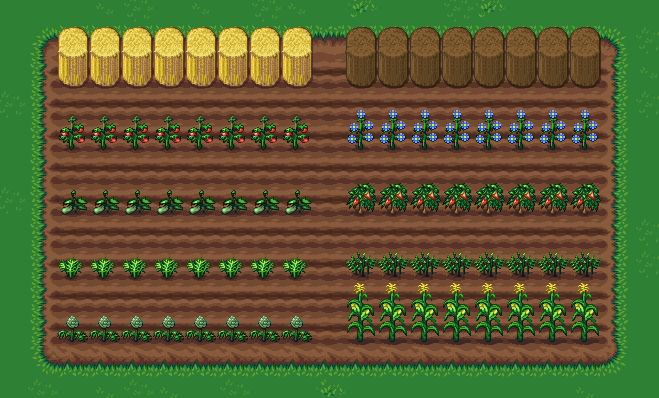
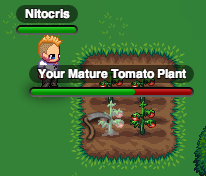
Once you have tilled some soil, you may plant your seeds or potatoes. Keep in mind that it is best to plant things in rows or grids with space to move between. Crops take awhile to mature, and pass through 4 stages in total. You will only be able to harvest them in the final, fruit-bearing stage. To harvest, you’ll need to craft a Scythe. Harvesting a mature plant will reward you with a small amount of seeds and produce (produce only in the case of potatoes).
Brewing
Coming Soon
Parties
Coming Soon
Spells and Modifiers
Coming Soon
Combat
At the moment combat is fairly basic, consisting of melee combat with swords. Swords can be crafted much like any other tool out of stone, copper, bronze, or steel with the stone sword being within the domain of apprentice general crafting and the more advanced specimens requiring apprentice blacksmithing and smelting.
To craft your first stone sword, remember that stone is acquired as a collecting stone from a stone outcropping.
Axes also serve as a weapon, in addition to their main role as a tool.
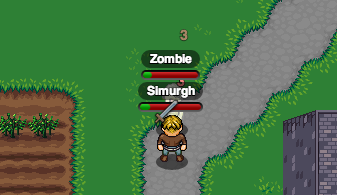
Once you have gained possession of a sword, you are ready to take on enemies. To make your sword ready, place it on your hotbar and select the hot bar button to make it your active item.
To attack, simply click your target while the hotbar button containing your sword is active. If you are close enough you will attack with your sword. If you are too far away clicking on your target will move you in range. You can continue to attack by repeat clicking or just hold the mouse button (or your finger on tablets) down and you will auto-attack.
When your health gets low, you can consume food to restore health. To eat, place the food item on your hotbar. Food items are members of a special type of action group that will not take the action bar’s focus when clicked or activated with a hot-key. These types of items will be denoted by a green background to the action bar item.
You can mitigate the damage you take by wearing items that give you more protection. At the moment, there are some mail and plate items available via blacksmithing that significantly reduce the amount of damage you take. There are also advancements that make you tougher and able to withstand more damage.
Your damage output can be increased by crafting and using higher quality weapons. Also, like mitigation, there are advancements that will increase the amount of damage you do.
Coming Soon: Ranged Weapons and Offensive / Defensive Spells
Containers
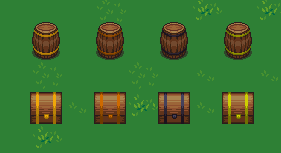
Containers provide a way for players to store more items than their inventory can hold and to provide an interim method for players to share items with each other. Containers currently consist of barrels and chests of 4 different grades: copper, bronze, iron, and gold. Copper is the lowest grade, which can hold 10 items in total. Each successive grade can hold 10 more than the one before it, finishing with 40 items in the gold grade containers.
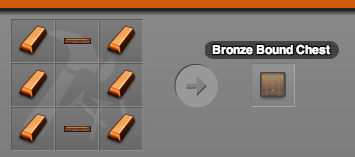
Crafting chests and barrels requires at least apprentice level competency in general crafting, smelting and carpentry.
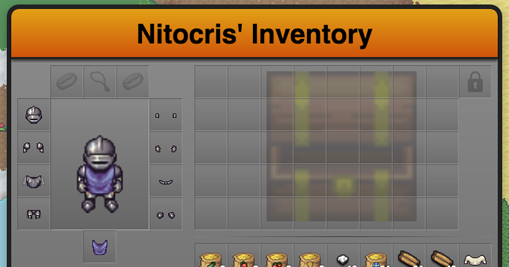
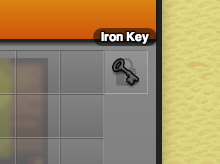
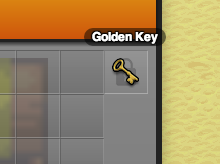
When in close proximity to a container, you can bring up the interface by clicking on the container. Simply drag and drop items to and from the container to deposit and withdraw. Each container comes with a single unique slot in the upper right hand corner and is further distinguished by the lock icon. This slot accepts keys and allows for the placer of the container to restrict access. Currently there are two keys available: the iron key and the golden key. The iron key restricts access to only the character that initially placed the container. The golden key restricts access to all characters on the same account as the character that initially placed the container.
Signs
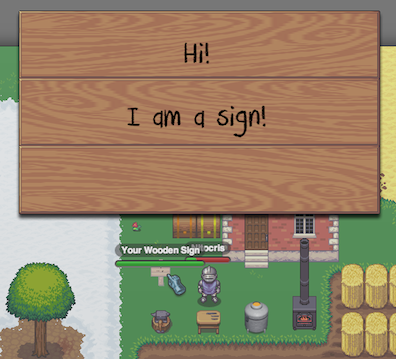
Signs provide a way for GMs and players alike to leave messages, location names, or directions for others to read. They are fairly simple to create but moderately time-consuming to edit for players.
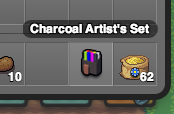
Crafting a sign requires at least apprentice level competency in general crafting and carpentry. Charcoal artist sets, which are used in editing the sign’s content, requires apprentice level cooking and the wholesale clearing of entire meadows of flowers for their pigments.
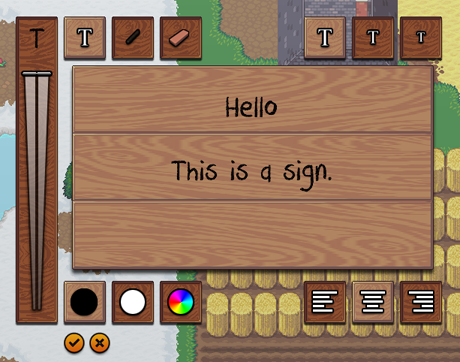
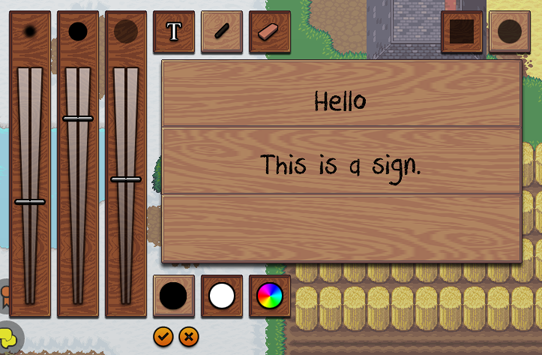
Clicking on a sign with a charcoal artist’s set selected will bring up the sign editor. There are three basic modes: text, drawing, and erasing.
Text editing provides you with a transparency slider on the left, three choices of font size in the upper right, three justification modes in the lower right, and three coloring options in the lower left. Click where you desire the text and start typing. Hitting enter will start a new line, and the delete / arrow keys should also work as expected. Apologies for the missing cursor though. Hopefully it will be found and put back to work shortly.
The draw and erase options share the same controls: blur, size, and transparency sliders on the left, and the ability to toggle between a square and round brush in the upper right. There is currently a bug in the blur code that can produce odd results for certain colors, so be forewarned.
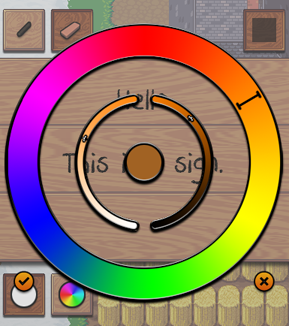
The color options in the bottom left allow for quick selection of black and white as well as a more detailed full color picker. Click on the color wheel option to open up the color picker. The outer ring allows the selection of the hue, while the left and right inner arcs allow the adjusting of saturation, and brightness. The center circle represent the final color.
Campfires
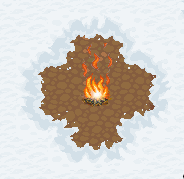
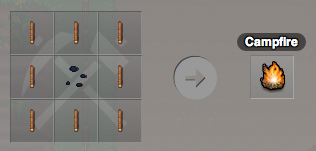
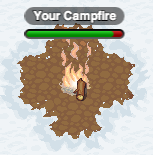
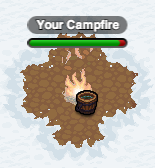
Campfires are available as a cheap and portable means to get a cooking station up and running. Crafting a campfire requires only a apprentice level understanding of general crafting, but to be able to actually use one you will need at least a apprentice level understanding of cooking. Campfires have several properties that set them apart from other items in Lugdunon. First, campfires will exhaust their fuel supply and require frequent additions of wood to keep them going. Secondly, campfires will slowly warm the area surrounding them and eventually cause any snow in the immediate vicinity to melt. Finally, campfires can be extinguished prematurely by pouring a bucket of water upon them.
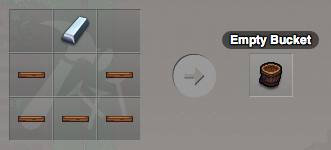
Buckets are always a useful item to have around an open fire, especially if that bucket is filled with water. Crafting a bucket requires at least a apprentice level competency in general crafting, smelting and carpentry.
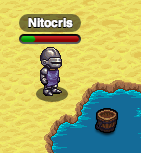
To fill a bucket with water, click on any available body of water. Buckets can also be filled with other liquids. Experiment to see what can be found!
To keep a campfire going, feed it wood! Wooden planks, sticks, and logs all work to varying degrees of success.
When you are finished with a campfire, you may pour a bucket of water on it to extinguish it.
Macros
WARNING: Unless you have a complete understanding of what a macro does, never, never, never use a macro from an untrusted source.
Macros allow you to add custom actions that enhance your play experience. The entire client-side API is at your disposal, so there is almost no end to what you can accomplish. If desired, you can check out some of the possibilities in our Macros section. To open the macro editor dialog, you can click the macros button located in the lower left of the game screen. The macros button will also show you how many macros you have currently available in its expanded state.
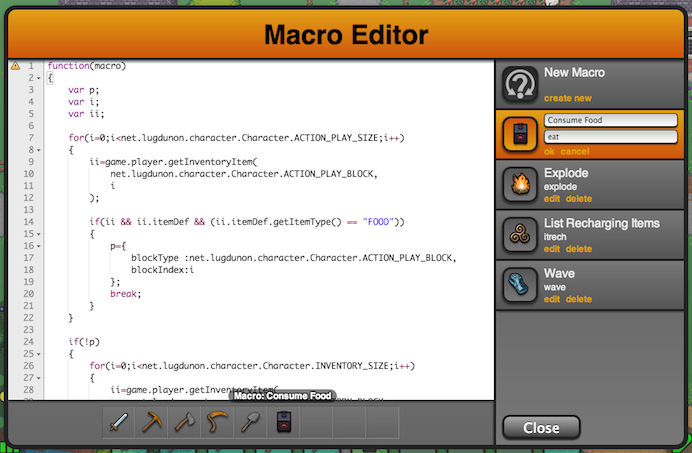
The macro editor dialog allows you to create, edit, delete, and assign macros to the current action bar. To the left of the dialog, the macro script editor takes up the majority of the real estate. Just below the script editor is the current action bar. To the right is the list of current macros, with a create macro item at the top. To create a new macro, click the
‘create new’ text in the create macro item. To delete and existing macro, click the ‘delete’ text at the bottom of an inactive macro list item. Clicking the ‘edit’ text at the bottom of an inactive macro list item will activate the macro, placing it in edit mode. When this happens, the macro’s script will be loaded into the script editor, and the name and id fields will become editable. While in edit mode, you can also change the icon by clicking on the current icon to launch the icon selector dialog. Once you have completed editing, click the ‘ok’ text to save the macro, or the ‘cancel’ text to cancel all of your changes and revert back to the previous macro state.
Assigning a macro to the current action bar is as simple as dragging the macro’s icon to the corresponding slot in the action bar. Please keep in mind that you will be unable to replace an instanced item on the action bar with a macro. To place a macro in a slot occupied by an instanced item, you must first move that item into your character’s general inventory.
Once you have added a macro to an action bar you can simply click on it to fire the macro, just like any other action bar item. Macros can also be executed by using the /macro console command, or by typing ‘game.macro(macroId)’ into the browser’s console.
