How to Play
Contents |
Movement
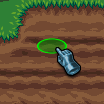
Movement is accomplished by simply clicking where you want to go, so long as the destination is marked by a green targeting oval. If there is a clear, unobstructed path to the requested location your character will move there. You may click on another destination while your character is currently in the process of moving to another destination. If there is no path, or the path is too long your character will simply stay put. If you are trying to move behind a targetable object, you may temporarily disable the mouseover selection of objects by holding down the ‘control’ key.
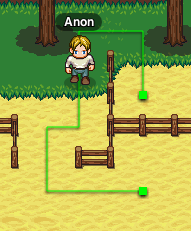
Currently in the alpha build you can enable character path rendering by typing /df paths into the console. This will show the path that characters are taking as a green line.
Movement may also be accomplished by using the keyboard. The default keybindings for movement are the standard WASD and arrow key setups.
Inventory
You can access your inventory by hitting the ‘i’ key on your keyboard or clicking on the ‘…’ button on the far right of your action bar. You can close it at any time by hitting the ‘i’ key on your keyboard or clicking anywhere on the game field outside the inventory window.
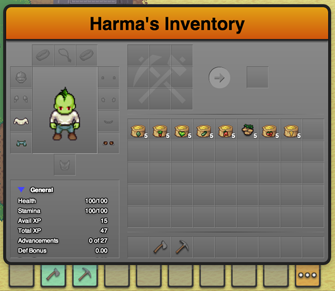
The inventory window consists of five main areas: your character’s ‘equipment’ or the items they are wearing, your character’s stats, the crafting area (which will be discussed later), the main inventory space, and finally the action bar.
You are free to drag items around the inventory screen as you wish, with the exception of your character’s equipment slots. Only items that can be worn in that particular slot can be dragged onto an equipment slot. If you move an item from one your character’s equipment slots into the general inventory, you are effectively removing the item from your character’s body and all the properties that particular item bestows when worn will be removed as well.
With stackable items, there are a few extra things to consider. You can drag an item or stack of items onto another partial stack of the same item and it will add them together. Holding ‘shift’ while dragging a stack to an empty slot will split the stack in half, and holding ‘alt’ (‘option’ on macintosh computers) down while dragging a stack to an empty slot will leave one item behind and carry the rest to the target slot.
If you wish to use an item in the game world, simply drag the item to a slot on the action bar. Then after dismissing the inventory window, you will be free to use or select the item on the action bar to use as your main item.
To delete an item, simply drag it off the inventory window to the game field and you will be greeted with a prompt to guard against accidental deletions.
Interacting with the game world
Interacting with elements in the game world consists of using a particular item on a particular element. To use an item, make sure it is on your action hotbar and selected. You may select an item on the hotbar using one of three methods: clicking on it, using your mouse’s scroll wheel to cycle through them, or by using one of the predefined hotkeys (1-9 activates the main action buttons in left-right order and 0 activates the ‘…’ button).
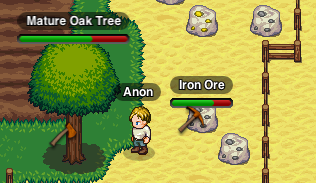
Each item has one or more specific uses. For instance, you would use an axe on a tree to chop it down, or a pickaxe on an ore vein to mine it. Holding the ‘shift’ key down while interacting with elements will lock your character in place, preventing them from accidentally moving.
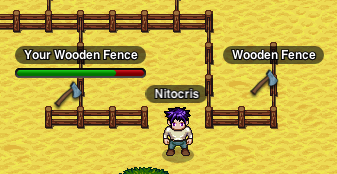
There is a concept of ‘ownership’ in lugdunon. If a game master places items, players will not be able to interact with that item if it is not permanent. If a player places an item you will only be able to interact with that item if you were the one who originally placed it. An item you can interact with will have a durability bar below its label.
Shovels have the unique ability of being able to ‘claim’ a tree or flower that a game master has placed. Use the shovel to uproot the tree or flower and you will receive an item in your inventory that allows you to replant the tree or flower where you choose. Once the item has been replanted, it will be ‘owned’ by you.
When you perform an action on an element that results in loot being generated, your share will automatically appear in your inventory. You will be notified of this via the console. Be aware though that in the current build, if you do perform an action that results in loot being generated with a full inventory, that loot will be lost!
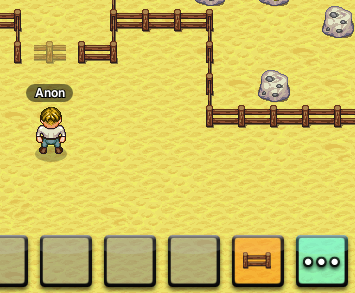
You may also place certain items in the game world, such as fencing. Simply drag the item to the action bar in your inventory, and then select it as the current tool. You are now free to place the item! Be aware though, that placing things may consume the item. Usually you can retrieve the item by using the appropriate tool on your placed item (in the case of a wooden fence, an axe should do the trick).
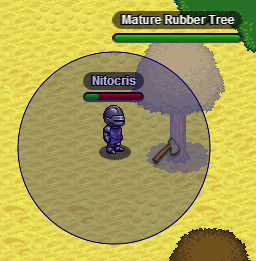
Keep in mind that most items have a range limit to them, so they will only work if used if the cursor is close enough to the player’s character. To see what the range of your currently selected tool or placeable item is, hold down the ‘alt’ key (or ‘option’ key on a Macintosh) to see the range. Tools and placeable items will display their range in blue, whereas weapons with display their range in red.
Character Advancement
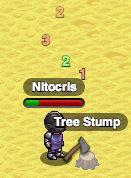
In Lugdunon pretty much everything you do: crafting, resource gathering, combat, etc, can grant your character experience. Experience can be used primarily as currency to purchase perks and upgrades through the advancement system. When you gain experience, the amount gained will appear to float upwards from you character’s name plate in green.
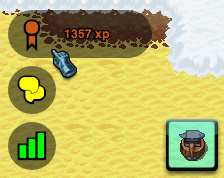
Once you have gained enough experience, you can spend it by clicking on the advancements button located in the lower left of the game screen. When you mouse over this button, it will slide out to reveal how much experience you currently have available for spending.
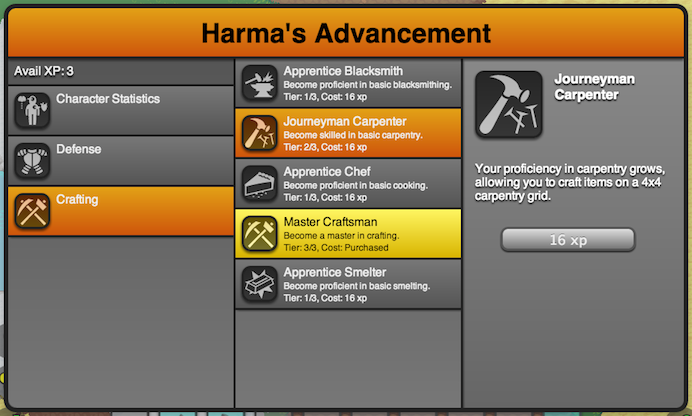
Clicking on that button will open the Advancement UI. In the default game implementation, the cost of a particular advancement is 2ca, where ca is the current number of advancements purchased, capping at 220 (or 1,048,576). This results in an exponential growth in advancement cost. Keeping that in mind, you must plan your initial purchases carefully, as the cost will rapidly become quite expensive. The amount of experience that you currently have available to spend is visible in the upper left of the UI.
Advancements are currently grouped into three categories: items that affect your character’s stats, items that affect your character’s capability for defense, and crafting. Clicking on one of the three groups will load the appropriate advancements in the list to the right. Further, clicking on an advancement item will show more detail to the right, along with a purchase button showing the cost to purchase the advancement. If an advancement has already been purchased, it will appear with a golden highlight, and the cost reading ‘Purchased’.
Advancements can be tiered, in the sense that once you purchase an advancement, another becomes available that builds on the previous one. If an advancement is tiered, the currently available tier (or max tier if the final tier has been purchased) will be displayed in the advancement list item.
Crafting is tied in fairly tight with advancements, requiring the purchase of advancements before the ability to craft is even available. Typically you would spend your first few experience points on becoming proficient in each of the crafting methods before focusing on other upgrades.
Crafting
[[File:|frame|none|alt=|]]
Farming
[[File:|frame|none|alt=|]]
Parties
Coming Soon
Spells and Modifiers
Coming Soon
Combat
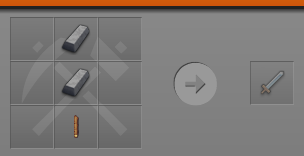
At the moment combat is fairly basic, consisting of melee combat with swords. Swords can be crafted much like any other tool out of stone, copper, bronze, or steel with the stone sword being within the domain of apprentice general crafting and the more advanced specimens requiring apprentice blacksmithing and smelting.
To craft your first stone sword, remember that stone is acquired as a collecting stone from a stone outcropping.
Axes also serve as a weapon, in addition to their main role as a tool.
Once you have gained possession of a sword, you are ready to take on enemies. To make your sword ready, place it on your hotbar and select the hot bar button to make it your active item.
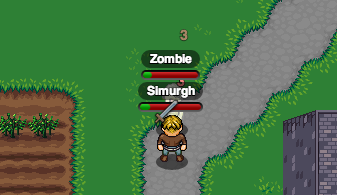
To attack, simply click your target while the hotbar button containing your sword is active. If you are close enough you will attack with your sword. If you are too far away clicking on your target will move you in range. You can continue to attack by repeat clicking or just hold the mouse button (or your finger on tablets) down and you will auto-attack.
When your health gets low, you can consume food to restore health. To eat, place the food item on your hotbar. Food items are members of a special type of action group that will not take the action bar’s focus when clicked or activated with a hot-key. These types of items will be denoted by a green background to the action bar item.
You can mitigate the damage you take by wearing items that give you more protection. At the moment, there are some mail and plate items available via blacksmithing that significantly reduce the amount of damage you take. There are also advancements that make you tougher and able to withstand more damage.
Your damage output can be increased by crafting and using higher quality weapons. Also, like mitigation, there are advancements that will increase the amount of damage you do.
Coming Soon: Ranged Weapons and Offensive / Defensive Spells
Containers
[[File:|frame|none|alt=|]]
Signs
[[File:|frame|none|alt=|]]
Campfires
[[File:|frame|none|alt=|]]
Macros
[[File:|frame|none|alt=|]]
